Are you tired of the same old boring clothes in your wardrobe? Do you want to add a personal touch to your apparel? Look no further, because custom patches are the solution to your fashion woes! With handmade patches, you can create unique designs that reflect your style and personality. In this comprehensive guide, we will take you through a tutorial on everything you need to know about making custom patches from scratch.
I. What are DIY patches?

DIY patches are patches that you can make at home with simple materials and tools. They can be used to decorate clothing, bags, hats, and more. Patches have been used for centuries as a way to display symbols of allegiance or identity. They were originally used on military uniforms and have since been adopted by various subcultures.
Making your own patches allows you to express your creativity and personalize your clothing and accessories. It’s also an affordable way to add unique touches to your wardrobe.
II. Getting Started: What You Will Need

DIY Patches: Materials and Tools Needed
Before we dive into the nitty-gritty of making DIY embroidered patches, let’s take a look at the essential tools you will need for this project. Here’s a list of things you will need:
- Patch Fabric (cotton, denim, rhinestone, twill fabric, or any material of your choice)
- Embroidery thread (in various colors)
- Embroidery hoop
- Sewing machine
- Spray adhesive (optional)
- Fabric glue
- Paper backing (optional)
- Needle
- Scissors
- Fusible interfacing (optional)
- Iron (optional)
III. Creating Your Design

A. Sketching your design:
The first step to making DIY patches is creating a design that you would like to make embroidery patches onto your fabric. You can use any design you like, from simple shapes to intricate patterns. You can either draw your design freehand or print out a template to trace onto your fabric.
Sketching allows you to get your ideas out quickly and edit them as you go. It also gives you a chance to filter out ideas that might not work before you start putting them onto fabric.
B. Transferring your design onto fabric:
Once you have your design, transfer it onto your fabric using a pencil or water-soluble pen. Make sure to trace your design onto the back of your fabric if you are using a template so that the traced lines do not show up on the front of your patch. This step ensures that you have a clear outline to follow as you embroider your patch
C. Choosing colors and textures:
Choose colors and textures that complement your design and the garment or accessory you’ll be attaching the patch.
When choosing colors and textures for your patch, keep in mind what will complement your design and the garment or accessory you’ll be attaching the patch to. This step is where you can get creative and make your patch unique. Be sure to consider the overall aesthetic you’re going for to make patches, and choose colors and textures that will enhance it.
D. Tips for creating a clean design:
For patch design, please keep the below rules in mind.
1.Less is more:
Keep your design simple and avoid clutter. Stick to a few colors and fonts that work well together. Avoid using too many colors or complicated shapes.
2. Use white space:
White space refers to the empty space between design elements. It can help to create a sense of balance and make your design more visually appealing. White space doesn’t have to be white; it can be any color or texture that creates visual breathing room.
3. Choose the right colors:
Stick to a limited color palette and choose colors that work well together. Avoid using too many bright or bold colors as they can be distracting.
4. Keep it consistent:
Use consistent font sizes, styles, and colors throughout your design. This will help to create a cohesive look and make your design more visually appealing.
5. Balance your design:
Balance is key to creating a clean design. Make sure your design elements are evenly distributed throughout the space and avoid overcrowding one area of the design
IV. Embroidering Your Design
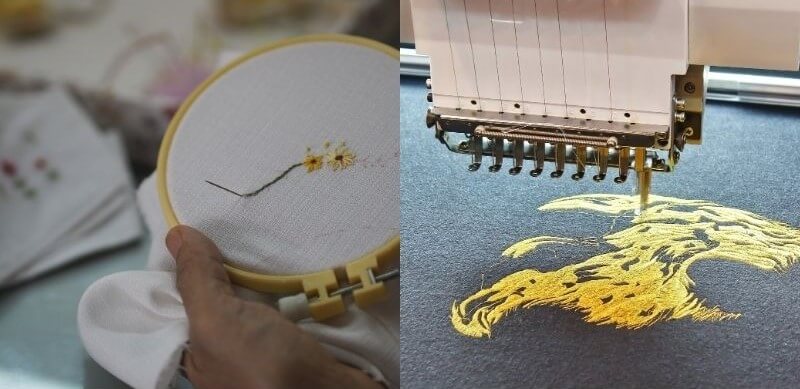
Now that you have your custom designs on your fabric, it’s time to start embroidering! Here are the step by step instructions:
Thread your needle with embroidery thread and tie a knot at the end of the thread.
Place your fabric in the embroidery hoop and tighten the hoop.
Start stitching your design, using different embroidery stitches to create texture and depth. You can use a variety of stitches, such as the satin stitch, backstitch, or French knot.
Once you have completed your design, tie off your thread and trim any excess thread.
V. Adding Iron-On Adhesive
A. Types of adhesives and their recommended uses.
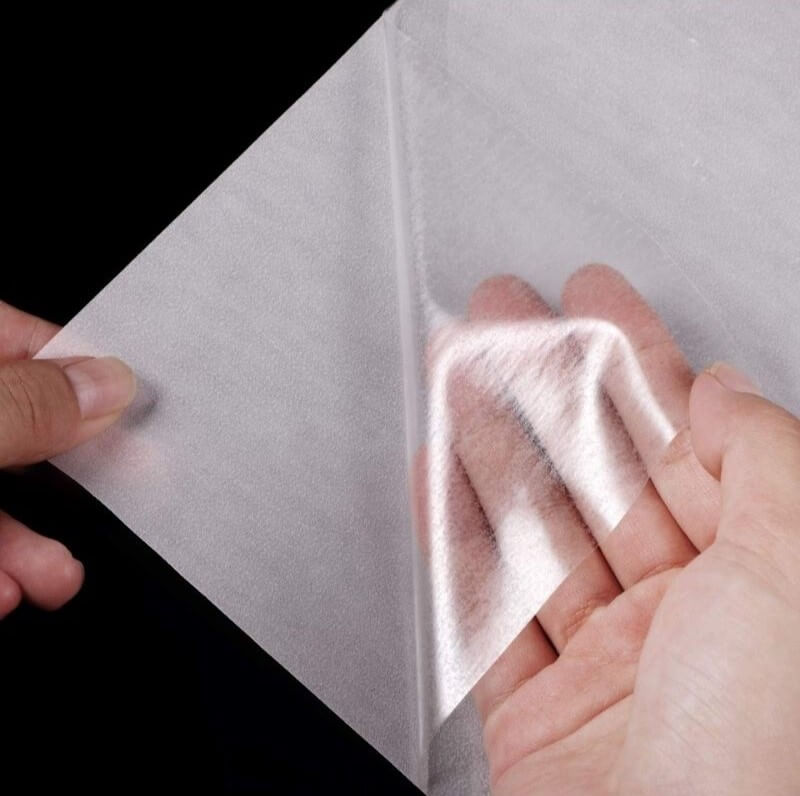
Iron-on adhesives come in different types, and it is essential to choose the right one for your project. Some iron on patches adhesives work best with cotton fabrics, while others are designed for polyester and synthetic blends. For example, heat transfer vinyl (HTV) is a type of iron-on adhesive that is suitable for large designs and is recommended for use with a heat press, while the iron-on paper is a lightweight material that can be applied in one layer
B. Applying adhesive to your patch
To apply an iron-on adhesive to your patch, cut a piece of adhesive to fit the size of your patch. Place it on the back of your patch and use an iron to activate the adhesive. Make sure to follow the manufacturer’s instructions for the patch using the right temperature and pressure settings to use.
C. Applying the patch to your garment or accessory.
After the adhesive has cooled, place the patch on the garment or accessory, and use an iron to attach it. Make sure to apply even pressure to ensure the patch adheres correctly. Use a cloth or parchment paper during iron-on patch, to protect your own custom patches from the iron’s heat and to prevent it from melting or sticking to the iron.
VI. Alternative Methods to Iron-On Adhesive
A. Using fabric glue to attach your patch:
Fabric glue can be used to attach your patch if you don’t have access to an iron. Apply the glue to the back of your patch and press it onto the garment or accessory.
B. Sewing your patch onto your garment or accessory:
Sewing your patch onto your garment or accessory is a traditional and sturdy method. Use a needle and thread to stitch around the edges of the patch and attach or sew it to the fabric.
VII. Finishing Your Patch
Congratulations, you have now created your DIY patch! But before you can attach it to your clothing, you will need to finish it off. Here’s what you need to do:
Cut the patch out from the fabric, leaving a small border of fabric around the edges.
If you want your fabric patches to be sturdier, you can add a layer of fusible interfacing to the back of your patch. Simply cut out a piece of interfacing that is slightly smaller than your patch, and iron it onto the back of your patch.
Finally, you can attach your patch to your clothing by either sewing it on or using fabric glue. And voila! You now have a custom patch that is unique to you.
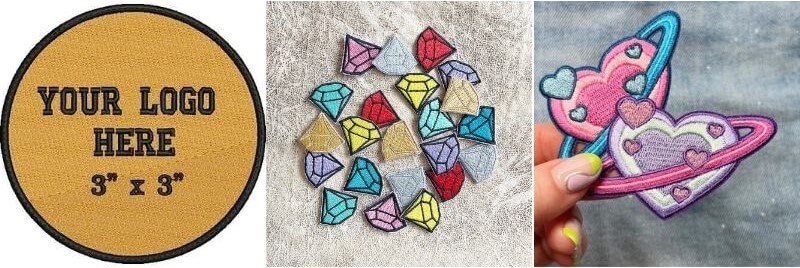
VIII. Sparkling Ideas for DIY patches
-
DIY embroidered patches
You can gather some embroidered fabric patches in Amazon or Etsy.
-
Embroidered gemstone patches
These kinds of patches have become increasingly popular in recent years, and it’s easy to see why. These unique and custom patches are perfect for adding a touch of glamour and style to any outfit, bag, or accessory.
-
DIY Tumblr-inspired patches
Some Tumblr designs are perfect for coffee lovers, cat enthusiasts, anime fans, and more. each design has its own unique style, there is a wide range of designs to choose from.
- Funky DIY patch dress
- Hand-stamped fabric patches
- DIY patch denim jacket
- Felt patches
- Emoji patches
- DIY sparkling patch clutch
IX. 4 Ways to Use Your DIY Patches

A. Adding personality to clothing
Add patches to your denim jacket or jeans to give them a unique touch.
B. Creating unique accessories
Use patches to decorate bags, hats, and shoes for a personalized look.
C. Decorating bags, hats, and other items
Add patches to backpacks, purses, and other items to make them stand out.
D. Selling or trading your patches
Once you’ve honed your skills, you can sell or trade your patches with others who are interested in DIY fashion.
X. Tips and Tricks
To make a perfect job, Here are some tips and tricks to keep in mind when making DIY patches:
Experiment with different fabrics and embroidery threads to create unique textures and colors.
Practice your embroidery stitches on a scrap piece of fabric before starting on your actual patch.
Use a lightbox or window to trace your design onto your fabric if you are having trouble seeing the traced lines.
If you make a mistake while stitching, don’t worry! Simply remove the stitches with a seam ripper and start again.
Conclusion
Making DIY patches is a fun and creative way to add a personal touch to your clothing. With just a few essential tools and some embroidery know-how, you can create custom patches that reflect your style and personality. We hope this comprehensive guide has been helpful in getting you started on your patch-making journey. Happy stitching!
34 Sewing Quotes That Will Have You In Stitches And Mend Your Soul
